Friday, May 28, 2010

Memorial Day Blog Hop

Welcome one and all to our Memorial Day Blog Hop.  I'm glad you could join us.  I hope you have seen many wonderful projects from the Memory Works Consultants. 

So here is my blog.  Please feel free to look around at my projects.  Up at the top, you will find links to projects I have made and tutorials I have done.  If you like what you see, "Follow Me" or subscribe to my feed with Feed Burner (on the right hand side...just enter your email address.)  I really love paper crafting, and my hope is to inspire you in your own creations.

Here are some pictures of my prize.  You can win a set of 5 cards.  These cards were made with the May MWExpress Kit.  I love the Memory Works Express Monthly kits!

Here are all five.
Here is a close up of two.
The three remaining cards.

*To win this set of cards, just leave a comment.
*This prize is open to anyone, including international participants.

**************************************************
Memory Works offers the best products on the market.  You can visit my Memory Works Website here.


You can see the Memory Works Blog here.  The ladies from Memory Works come up with some very beautiful and inspirational projects.


And last, but not least is the exclusive Simple Stories line from Memory Works.  It is the first kit that Memory Works has developed.  It is only available through Memory Works.  You can see more information about this beautiful kit here.

***********************************************
So, on to the next blogger you go.  You will be visiting,


If you get lost, go back to the start place at Sue's Blog here.

Thursday, May 27, 2010

Banner Tutorial Part 2

I'm back to show you how I finished the rest of the banner.
The embellishments I used are from Sassafras. 

Step 1
I cut out 3 inch letters from the "Lyrical Letters" Cricut Cartridge.  I used the jumbo feature.  I cut each letter three times.  I layered them with foam adhesive to make them 3-D.  So this was my first layer.  I placed the adhesive around each letter, and then put the next set of letters on top.  Then repeated the process once more.

Step 2
I put a chipboard piece between two layers to make it look like the crocodile was coming out from behind the letter O.

Step 3
I glued the letters on with Glue Dots.  When I put the other embellishments on, I had to use the foam tape again. I had to layer two pieces of foam tape on top of each other so that the chipboard pieces would look like they were sitting on top of the letters.

Step 4
To tie the banner together, I cut 8 inch strips of ribbon. I brought them through the backside of the triangles. Then I knotted them. I tied two pieces together at a time.
And here is the final product:
Yes, this is JoJo holding it up to show you.

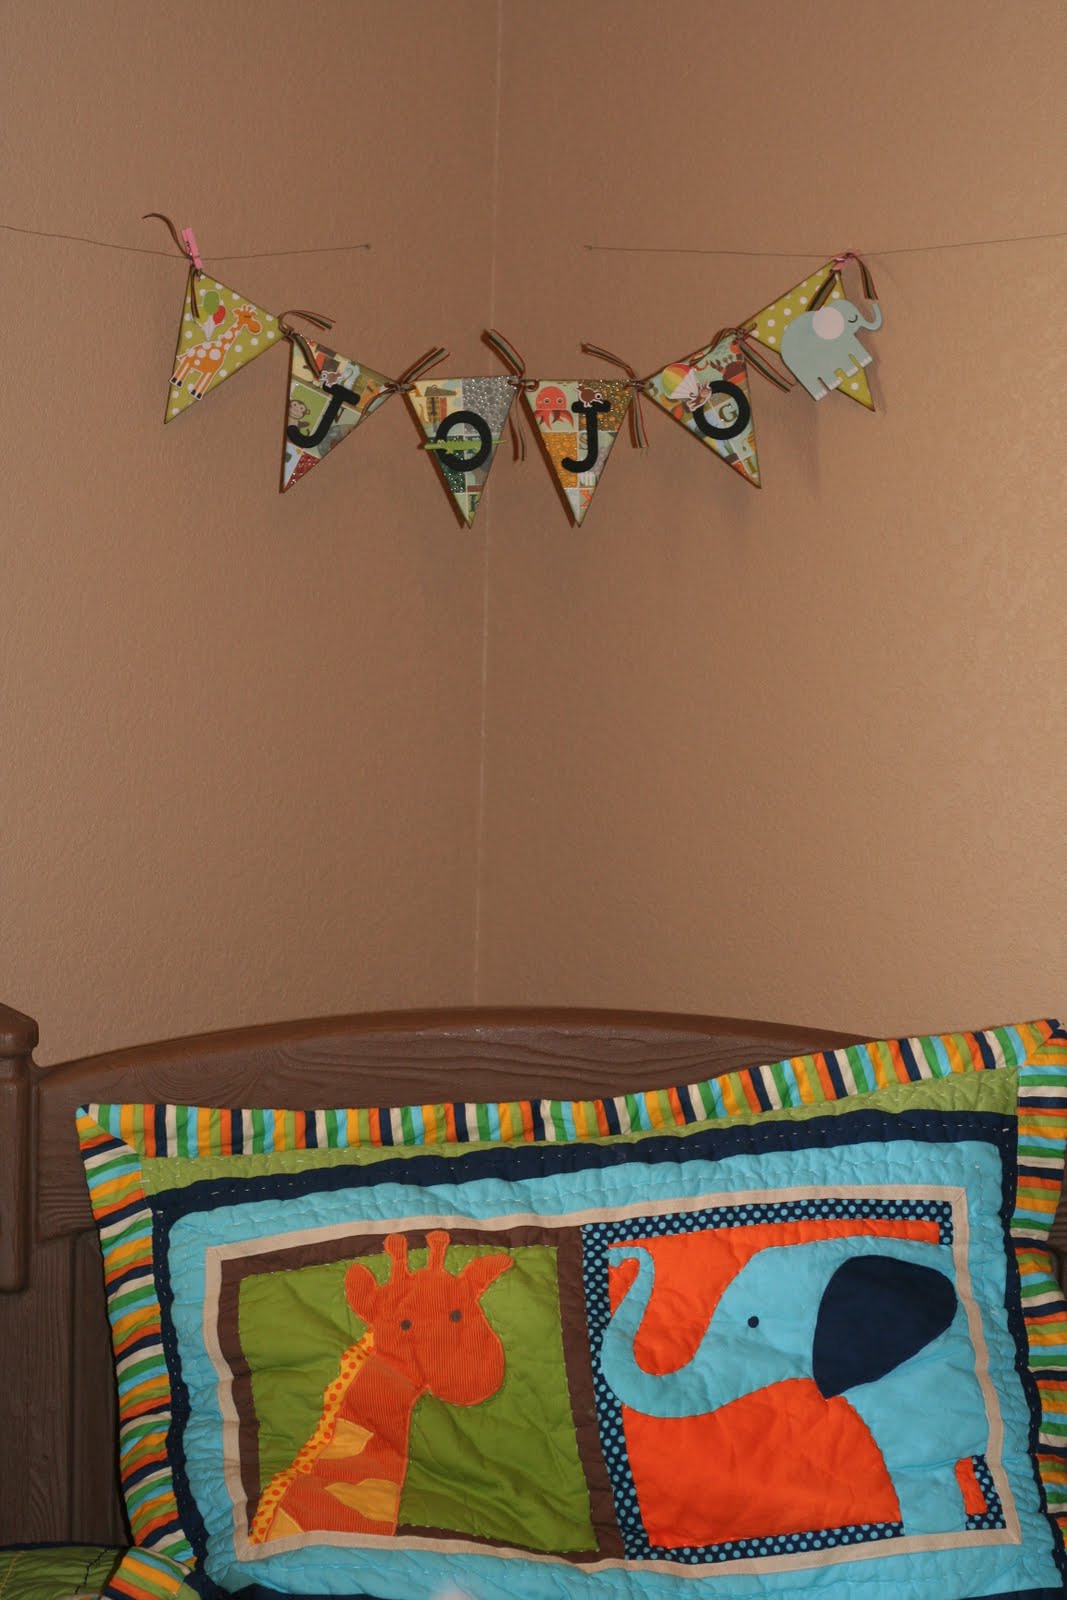
Here it is hanging in his room.

And here is JoJo in his bed saying cheese!  He kept asking to cheese him ...aka... take his picture.

I hope you enjoyed it.  I really did.  The banner was super easy and quick to make.  Please let me know if you have any questions. 
Not only that, but don't forget about the Blog Hop tomorrow.  Starting at 5 pm Eastern.  It lasts until May 31.  There will be plenty of prizes and things to spark your creativity. 

Wednesday, May 26, 2010

Banner Tutorial Part 1

First of all let me start by saying that I mixed it up a little bit.  I decided to use the Flying High Paper as well as some from the August 2009 MWExpress Kit.  JoJo has a jungle bedspread and I thought the papers would go with his room better.  Today, I will show you how to cover your chipboard.  Let's get started.

Step 1

I placed my chipboard shape next to the sheet of paper just to get an idea of where I wanted to place it when I flipped the paper over.

Step 2
Flip the paper over.  You want to adhere the chipboard to the back of the paper.

Step 3
Apply the Zip Dry.  Make sure to replace the cap on top of the container.  It really does dry very quickly and you'll have to unplug the applicator if you don't.

Step 4
Put your shape down on the backside of your paper.  Let it dry for a few minutes.

Step 5
Cut out your shape using an Exacto knife.

Steps 6 and 7
Sand the edges of your pieces.  This will make them smooth.  Then, to add more dimension, I went back and used Ranger Distress Inks on the edges.  I started with Vintage Photo and then went over the edges again with black soot.  I like the look, and it makes the pieces stand out better. 

I will be back tomorrow, if time allows to add embelishments and JoJo's name.  Otherwise, it will be next week...due to the bloghop May 28-31.  I hope you join us.  It should be a lot of fun.

Tuesday, May 25, 2010

Blog Hop!!!!!!

The Blog hop is quickly approaching.  You will have a chance to win 17 prizes.  16 prizes will be given away in total (one at each blog).  If you visit all the blogs, you are eligible to win a "grand prize."  That makes 17 prizes in total!!  I'm very excited.  Here is a sneak peek of my prize.

They are much cuter in person!!!!!

So Join us "Memory Consultants" 
May 28 (5pm Eastern)-May 31
Pass it on!

On another note...who wants to make a banner?  You know those cute little banners you can hang up for any season, or with names on them?  I'm going to be showing you how to make one this week, possibly carrying on to next week.  JoJo needs some sort of decoration for his room.  So, I'll be making one and sharing it with you all.  
Here are the supplies you will need:
 
$4.50

$6.50
I love this adhesive.  It works great for covering chipboard.


Cardstock of your choice.  I'm using "Flying High"  from My Little Shoebox.  I love the bright colors, and JoJo likes birds.  So it works out.

Ribbon and Embellishments

Until Next Time!

Monday, May 24, 2010

A Week in the Life Cover Page

So, how about a tutorial for my week in the life cover page.  It looks like this...almost finished...except for the photo.  I'm out of ink.  But, I thought I would share what I have so far. 
Supplies you will need:
1.  To start I cut a strip of craft paper and covered it with American Crafts Thickers.  Then I rubbed Ranger Distress Ink over the top...in order to create a mask.


Peel off the stickers and trim the strip to fit your page.


2.  Place some border strips on the left side of your layout.  Add letters and embellishments.  I used BoBunny Flowers.


3.  Trim a matte for your photo.  In this case my photo will be a 5x7.  So, the matte needs to be 5 1/2 x 7 1/2.  You will need to cut two mattes.  Adhere one matte down with glue dots and place foam adhesive on top of the matte.

4.  Place your second 5 1/2 x 7 1/2 matte on top.  This will leave you room to hide journaling under the photo matte.


Hope this all made sense.  Please leave a comment if you have questions.

Sunday, May 23, 2010

Interesting Occurences today

Fancy Pants Papers, Basic Grey Chipboard

1.  I did nothing today.
2.  Water heater hose broke-husband went to store is now fixed.
3.  Yesterday Wolfie smashed JoJo's face at Chuck E Cheese-his face is malproportioned.  It looks ridiculous.  The swelling has lessoned but still there.
4.  Maddie told me that me that he forgot what Marsha ( the deceased guinea pig) looked like.  Do I have pictures?  My heart went crack, crack, crack...that was so sad.
5.  My mom came over to open a bottle of wine.  She needed the wine opener.  Where was it?  We couldn't find it anywhere.  Outside...Maddie took it outside to stab the ants with it.  He lied and told me the dogs took it outside.  To which I told him dogs don't have hands to carry it with.  So he fessed up.  Please tell me how to keep a straight face through this.  I did, but my mom was laughing in the kitchen.  That really made it much harder. 

Enjoy yourselves this evening.  Hopefully you can all tell me what happens on Lost because I gave up on that show years ago.

Friday, May 21, 2010

How about a sketch?

It's been a long time since I posted a sketch.  It's pretty self explanatory...a 12x12 layout with 3 4x4 boxes for photos or journaling.  The blotch in the back is for some sort of embellishment behind the title.  I just don't have any fancy sketch software so that's what I came up with in Photoshop.  I'd love to see what you come up with...so if you want to share feel free.  The last day of school was today!!!!!!!  I am done for two months.  I get to stay home with the kids.  I want to get some projects done. 

Don't forget the blog hop on Friday, May 28-May 31.  There are lots of ladies participating.  There will be tons of prizes.  Tell all of your friends to come and join us.  This is the first time I've done a blog hop.  I'm excited.  (I love that Italic Font...maybe I'll use it all the time).

The kids are doing better regarding their little pet.  Maddie tried to blame her death on JoJo because he said JoJo held her tight under the stomach.  I had to tell him she died from sickness not anthing that anyone did.  I don't want to get another guinea pig, but he wants one.  So, I don't know.  I just don't want to go through this again.  Until next time...

LinkWithin

Related Posts with Thumbnails